Tables in Microsoft Word
Tables are the coolest. Get to know how to use them and how not to use them, and you'll love them like I do.
When to Use Tables
- Side-by-side bulleted lists
- Side-by-side text, such as instructor text alongside of student text, or for troubleshooting manuals
- When you're tempted to insert a spreadsheet
- When you think you need a spreadsheet to do (minor) calculations
- For signature lines
- To have headings "top-aligned" side-by-side with a paragraph, such as with a resume
- In forms (definitely in forms!)
Tables are used on the web a lot, and just as ill-used as Word tables. Here's a few tips, and why they work.
No paragraph returns!
The ideal table in Word won't have any paragraph returns in it. Why? If you're using table columns to align text side-by-side, likely, you'll have a bunch of paragraph returns to space them perfectly left and right.
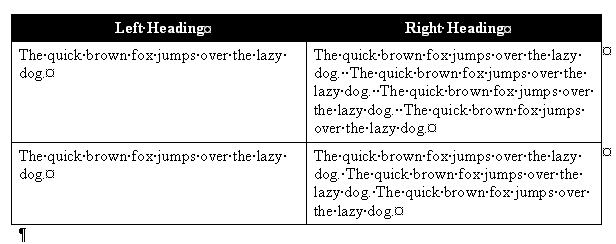
The Wrong Way
What will happen to the table below if we take the word "lazy" out of the first paragraph of text in the left-hand column? Everything bumps up one line, and our 2nd paragraph is no longer aligned side-by-side with its paragraph.

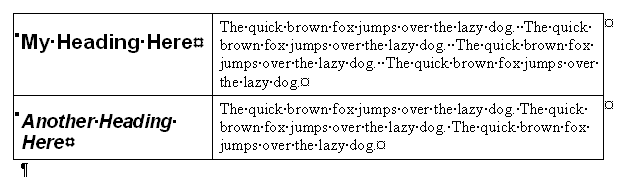
The Right Way
Here, we create a new table row for each paragraph. I also like to select my entire table and Format Paragraph and put 3 in space before and space after (or use styles that do this for me). It provides a nice amount of white space around your text.
How to Get it Right if it's Already Wrong
Beginning at the bottom of your table create a bunch of rows. Select your text, a paragraph at a time, working from the bottom-up, and drag down into the new rows.
The Wrong Way
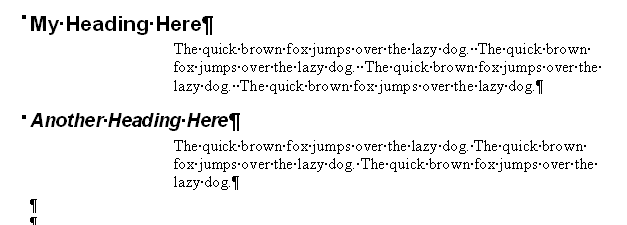
I've seen many documents with tables and tables and tables of information to provide a layout like the following.
It's okay to do this, but such a bunch of unnecessary trouble in very large documents. Instead, create styles for your headings, and then have your body text style indented a couple of inches. While you may use up a few extra pages, you're not dealing with stupid layout issues.
How to Get it Right if it's Already Wrong
Select your table. Hit Table Convert Table to Text. Choose Paragraphs, OK.
For Signatures
It's really simple to put signature lines using table cells. I like to begin by inserting a 3-column table, and set it up as shown:
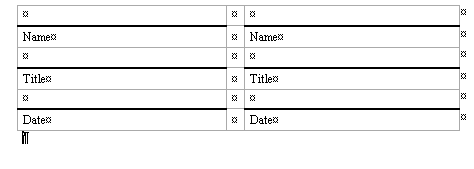
The table above is created using paragraph formatting with 3pts before and after. I used an extra heavy border line to create the screenshot only. Normally, I use the default borderlines. If you need three signatures, you can insert five columns instead of three. If you only need one signature, you could simply delete the text and remove the borders from one of the columns. Save this as an Autotext entry so you can use it again and again.
When Not to Use Tables
- For newsletters (usually, you'll want to use columns under Format Columns)
- To indent text (indent the style instead)
- For numbered lists with more than one column. (It's not worth the effort to figure out how to get your numbering to go left, then right, then left, then right. But if your numbering goes down a column, that's fine.) In other words, it's very difficult to create the following layout and use numbered lists. You might as well do it manually if you must have it this way.
