Create a Certificate Template in Microsoft Word
I've seen many people requesting a certificate template for Word. The heck with that-it's too easy to make your own!
Preparation
Whenever I create a certificate, I like to see what I'm doing. Go to Tools Options, View tab and turn on Text Boundaries. As always, make sure you have your Show/Hide button on. Make sure you are in Page Layout view by choosing it from the View menu.
Page Setup
Begin with a new, blank document. From the File menu, choose Page Setup. Use 0.5" margins all the way around, and set the page orientation to Landscape.
When you set these margins, you may get the following error:
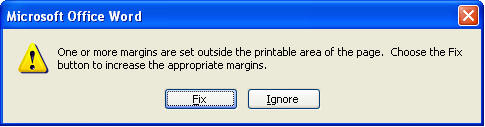
Hit Fix. You may find that it's only slightly off. For instance, my printer changes my right margin to 0.55" instead. I can live with that, because I won't likely have text on the far-right that could get cut off. If I do, I'll deal with it later. So I change that margin back to 0.5" and hit Ignore when I get the error again. If you do the same, just check carefully to make sure your text doesn't get cut off when you print.
Zoom
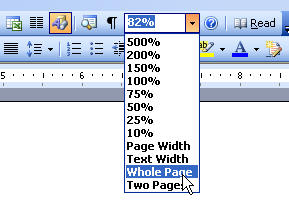
Hit your Zoom drop-down and choose Whole Page. If you can't find this toolbar button, you may want to change your toolbar settings to my recommended settings.
Setup
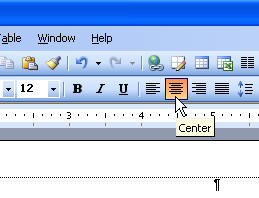
Immediately hit Center on your toolbar because a certificate contains mostly centered text and objects.
Place the Logo, Seal or other graphic, the title of the certificate, and any other text in the order that you desire.
WordArt
You can use WordArt to create rounded text, as follows.
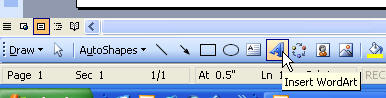
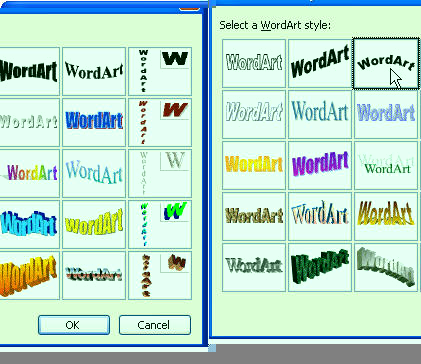
- From the Drawing toolbar, choose Insert WordArt.
- Choose a layout for your text and hit OK.
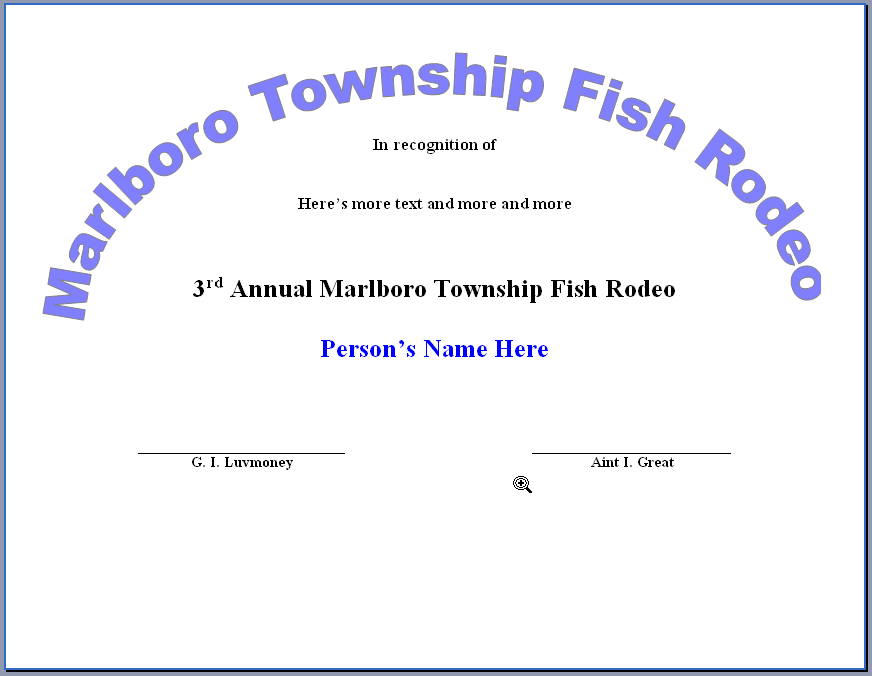
- Type the name of the certificate or of your agency and hit Ok. If it's not rounded enough, you can use the drag handles to drag down the object to reshape it. If your object takes up a lot of the page, you may choose to cut it and place it in the header of your document so that it's "out of the way" while you work. The printed item will look the same. Simply cut it, hit View Header and Footer, and paste it.
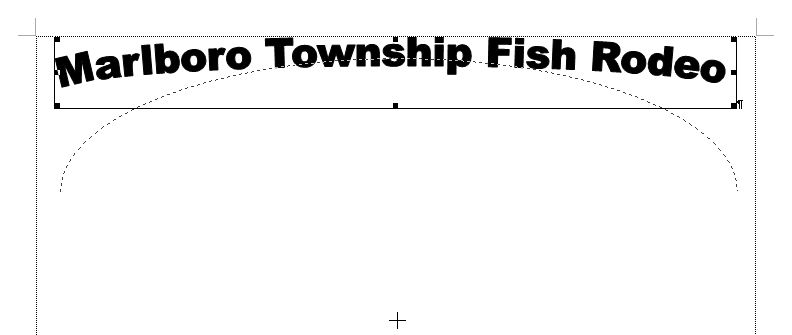
Here, I changed the color of the font in the WordArt by right-clicking and choosing Format WordArt. I also sent it "Behind text", and told it to center on the page using the different format settings there. I cut it, and pasted it into the header. Then I closed the Header/Footer toolbar.

Go ahead and type some text, decide placement for the name, etc. If you have many certificates to create, or if you create certificates often that are all the same type, such as Employee of the Month, you can now use the features available for Easy Guided Forms, and then save the document as a template.
Signatures
When signatures are required, I like to use table cells so that I can have lines on which people can sign there name, and when you type the name, the underscores don't have to be fixed.
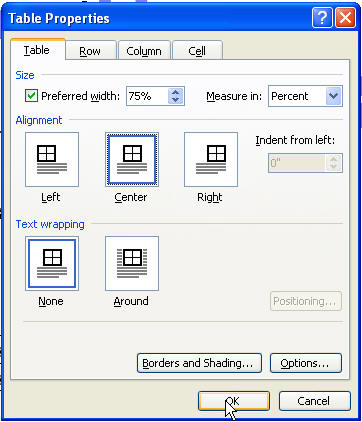
So, insert a 3-column, 2-row table. Go to TableProperties. Set the table's width to 75% (type the 75 into the box and it'll automatically change to Percent), and center the table.
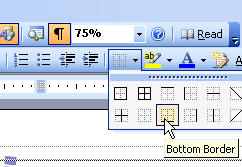
Select the whole table, and remove the border lines.
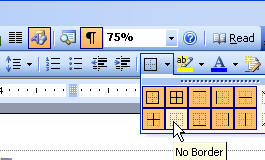
Click in the top-left and top-right cells and hit the Bottom Border button.
In the cells beneath, type the signers' names. If you want to add titles for the signers, just hit tab and type their titles beneath. Do a print preview.
Border
You can use a page border or you can have a fancy border using Clipart. But that's another article.