Setting the Print Area in Microsoft Excel
If you want your headings to repeat, click here.
There seem to be so many misconceptions about the Print Range in Excel, and many people set it unnecessarily.
Fit to a Page
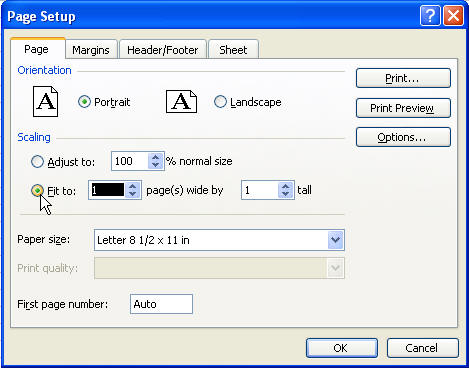
One of the few settings you might want to make is to force the data to fit to a page. Please keep in mind that you can't make it perfectly fit a page both horizontally and vertically. Make a choice, which is usually horizontal. To do this, go to File Page Setup and click the Fit To option. Click inside the "tall" box and delete the 1 that's there if you don't want it to fit to one page tall, but you do want to limit the horizontal width.
Setting a Print Area
Excel will automatically want to include all cells that contain information. But suppose the only thing you have over in column H is a note to yourself, but you don't want it to print. You can select entire columns to set a print range, there's no need to select all the cells. So, you can select columns A through G, for instance, and hit File Print Area, Set Print Area.
Print Area Too Big
So you didn't set a print area, but Excel wants to print too many pages? Or you set the width to fit to one page wide, and it only fills half a page and it's too small? It's as if Excel is seeing something in cells that don't contain anything? Well, it is...
You may need to clean up these areas of "dirty" cells.
-
Select the first completely blank column in your worksheet by clicking on its letter. Hold Shift+Ctrl and then hit the Right arrow key until you have selected all the way to Column IV. Hit Edit Clear All.
-
Select the first completely blank row in your worksheet by clicking on its number. Hold Shift+Ctrl and then hit the Down arrow key until you have selected all the way to Row 65536. Hit Edit Clear All.
-
Save your workbook, and try your print preview again.